Wednesday, November 25, 2015

Turkey and gravy

So look. The things people express the most fear and bewilderment about, when it comes to big roasted dinners, is the bird and the gravy. It doesn’t really even matter very much if your turkey is a little dry, if you make gravy that’s a religious experience. And you can DO that.

This is dead easy, folks. Stop thinking about it as some sort of dark culinary magic, and just think about that roasting that turkey like you were a baking really big chicken.

You got this.

Let go of the brining, basting, smoking, deep-frying fads, and just drop your oven rack to the bottom shelf. Preheat to 500 degrees, Fahrenheit.

If your bird is still frozen solid, send someone out for a few bottles of holiday cheer, and stick it in a bathtub full of hot water. I can’t help you until it's thawed enough to pull the giblets bag out of the cavity.

Assuming it’s actually NOT still frozen, prep your bird by massaging butter and the herbs of your choice all over it, on top of the skin and beneath it, and stuff the cavity loosely with quartered apples, oranges, onions, sage, and rosemary. Use real butter. It tastes better. And it’s French. It’s fashionable to be French, again. Pop the bird into that 500 degree oven. Wait a half hour. Reduce the heat to 350 degrees, and relax. Speaking of the Europeans, have a little Irish Whiskey in your morning coffee, with a splat of whipped cream. I'm a big fan of Jameson's Black Barrel. But hey, use the tipple of your choice. A dollop of rum or Bailey's Irish Cream isn't bad, either. Don’t drizzle creme de menthe on top, though, because that's just nasty. Now that the bird is in the oven, dump a quart or two of low-sodium chicken or turkey broth into a two-or-three quart saucepan, and toss in the giblets from that little paper bag that was inside the bird, too. What? You didn’t find a little paper bag inside your bird? QUICK! Pull that bird back out of the oven and check the big flap of skin over the neck area. It’s there, somewhere. It’s gotten weirdly fashionable for producers to hide the giblets, in recent years. Consider it a challenge.

Toss the giblets — all of ’em — into the pan of stock, put it to simmer on medium-low, and forget about it for a while. You're using low-sodium because you're going to let it simmer until it's about half or even less of its original volume. This concentrates the flavors. If you’re bored, rough-chop a stalk or three of celery and an onion, and throw those into the pan, too.

Have a little more coffee. Add another splash of whiskey. You deserve it. Everyone else is watching the Macy’s Day parade on TV, and making churlish noises about breakfast. Let 'em wait. You're Cooking the Turkey. Work it for a little extra mileage, whenever you can. Your turkey is going to need approximately 20 minutes per pound, at 350 degrees Fahrenheit.  Don’t screw around with the oven, that just dries things out and makes the whole process take longer.

Your stock and chopped veg and giblets are all reduced down to half or less of their original volume? Terrific! When you remove the bird from the oven to let it rest for 20 minutes (tented with heavy-duty foil, so it doesn't get cold) while you frantically get everything else ready to serve, strain that delicious reduced stock then pour it into the turkey pan over medium heat, and stir -- this is to deglaze all the delicious bird drippings and preserve their yummy essence in your gravy.

Pour the whole mess back into a pan you can deal with, and bring it to just under a boil. Have a glass of wine. You've earned it.

This is the point where a lot of people will tell you to make a slurry out of flour and water.

Don’t do that.

Use three or four tablespoons of corn starch, instead of flour, in that slurry. It's not nearly as prone to lumping, and doesn't have that weird raw-flour taste, if you mess up.  Call a dependable kid who is old enough to have health insurance into the kitchen to help. Have the kid use a wire whisk to keep the reduced stock and drippings moving constantly, while you add the corn-starch slurry a bit at a time, waiting to see how it thickens, until your gravy is the desired consistency.

Presto. Terrific bird, amazing gravy. That’s what counts the most — no one ever raves about the sweet potatoes or the green beans, right?

Happy Thanksgiving to you and yours. May it be a day of festivity, brightness, and laughter.

Saturday, October 22, 2011

VP Corn and Black Bean Salad

I recently got home from Viable Paradise, where I go as part of the workshop staff every year. Part of my staff duties include cooking for a whole bunch of people, all week.

The kitchens are tiny, the workshop is on an island (lovely and idyllic Martha's Vineyard), and ingredients may or may not be available from one day to the next; as a result, I especially prize recipes that have the inherent flexibility not only to scale-up well, but to adapt to missing or substituted ingredients gracefully.

This is one of those recipes.


Mac's VP Corn and Black Bean Salad

  • 4-6 ears of fresh corn It was the tail-end of the season, but we got our fresh corn at Morning Glory Farm, and were very happy -- but if good fresh corn isn't available, frozen will do, or even canned)
  • 1 16 oz can of black beans, drained and rinsed (I usually use about half-pound of dried black beans, though, soaked overnight then simmered in chicken or veg stock until tender)
  • 1 medium-to-large sweet onion
  • 1 large red bell pepper
  • 1 large bunch fresh cilantro (I've made this recipe with curly parsley, too -- it's that flexible)
  • 1 large ripe mango (frozen will work, too, though - you want the amounts of corn, black beans, and mango to be roughly equivalent to one another)
Peel, clean, husk ingredients as needed, small-to-medium dice, so everything is about corn-kernel or black-bean sized.


Dressing:
  • 4-6 fresh limes, juiced
  • 1 tablespoon finely chopped garlic (you can use granulated or powdered, if fresh is too strong for you)
  • 1-2 tablespoons sugar (I like sugar-in-the-raw)
  • 1 tablespoon or so each of Oregano, Thyme, Parsley, Sweet Basil, to taste (fresh is best, dried is fine too, though)
Throw all the ingredients in a big bowl, dump the dressing over top, stir gently, let marinate as time permits (a couple of hours, at least, for best results) -- Stir again, right before serving.

Wednesday, September 21, 2011

Best Ever Lemon Meringue Pie

This recipe comes from a lady from Sunburst, Montana who has gone from this earth.  I found it in a cookbook called Recipes From the Aschim Family Ancestry.

My husband and a number of his friends, who had the privilege to grow up in her community and experience her baking, all swear this is the best lemon pie they have ever eaten.

Since my husband is in his mid-seventies and remembers this from early childhood, when they had community gatherings, I have no idea how old the recipe really is, but if you like Lemon Pie, he and his friends swear this is the best ever.


Kate Aschim’s Lemon Pie

2 cups water
1 ¼ cups sugar
4 Tblsp corn starch
Rind of lemon
6 Tblsp Lemon juice
Butter (size of walnut)
pinch of salt
3 egg yolks

Stir sugar and cornstarch together; add water and cook in a double boiler. Add beaten egg yolk and cook until clear. Pour into baked crust.

Never Fail Meringue:

2 Tblsp sugar
1 Tblsp cornstarch
½ cup water
Put in a saucepan and cook until clear. Set in cold water to cool.

Beat to a soft mound:

3 egg whites
1/8 tsp salt
vanilla

Add 6 Tblsp sugar and beat well. Add cooled cornstarch mixture. Continue beating until meringue stands in stiff peaks. Spread over custard. Bake at 350 degrees for 17 minutes or until light brown.

Wednesday, June 22, 2011

Recipes: Antique and Modern

I just got back from the Pacific Northwest and spending a couple of week with Mac. It is good to keep in touch, but especially good to touch. It was a little cool, but all in all, very nice weather.

I shared a recipe with Mac and would like to share it with the blog. I think it is a lot of fun to know how our ancestors cooked and equal fun to convert those recipes.

This is simple recipe for a simple, inexpensive dessert. Indian pudding, then and now.

INDIAN PUDDING (1828 recipe)

1 cup (not quite full) molasses, 1 cup (not quite full) cornmeal, 1 egg, 1 heaping spoonful of butter or fat, salt, ginger or cinnamon to taste, all beaten together. Full quart of sweet milk put on to boil and the ingredients stirred in. Take from fire and add not quite a full cup of cold milk. Pour into pan onto lumps of butter. Bake one hour. Extra good.

This is the way they did it. I tried it like this.

INDIAN PUDDING (today's recipe)

4 cups plus 2/3 cup milk
2/3 cup yellow cornmeal
3/4 cups molasses (a New England friend uses Maple syrup, yummy)
2 eggs beaten
1 tablespoon butter
1/2 teaspoon salt
1 teaspoon ginger or cinnamon (I tried using both together, taste similar to pumpkin pie)

Preheat oven to 275 degrees F. Heat 3 cups of milk in top of double boiler (can use microwave). Mix 1 cup of milk and cornmeal. Stir into hot milk. Combine the molasses, beaten eggs, butter salt and spice and add to cornmeal mixture. Cook over low heat intil mixture thickens slightly. Remove from heat and add remaining 2/3 cup milk. Pour into a buttered 2 quart casserole and bake 2 hours. Serve warm or cool with whipped cream

*NOTE FROM MAC:
This is the sort of thing Mom would do with us, when I was little. We'd look at old recipes for pies, cakes, pancakes, bread -- anything you can think of, really, that people have eaten for generations. Then we'd make the recipe together, and experiment with ingredients and amounts.  So it was extra fun and a little like time traveling to make Indian Pudding together in my mom's RV kitchen.*

Saturday, May 14, 2011

Chocoholic Brownies

This is a great recipe for all of us chocolate lovers (what's not to love about chocolate?)

CHOCOHOLIC BROWNIES
Melt 1/2 cup semisweet chocolate chips (real chocolate, not chocolate flavored chips) with 1 stick of butter or margarine (not the soft spread). I use the microwave, but it can be done on the stove over low heat.

Stir in, mixing well after each addition:
1/4 cup flour
1/4 cup cocoa
1/2 cup brown sugar
1/2 cup sugar
2 eggs
1 teaspoon vanilla
1/2 cup pecans or walnuts (optional)

Spread on a sprayed or greased 8x8 baking pan. Bake at 350 degrees for 40 minutes.
To test for doneness, an inserted toothpick will come out crumble-moist. Do Not overbake. Cool before cutting.

Now you're ready to enjoy a chocolate delight.

Thursday, May 5, 2011

Yummy Scalloped Pineapple

I recently had the joy of spending Easter in Denver with two of my daughters and their families (Mac couldn't make it, bummer). Anyway, we had a lovely Easter dinner after the beautiful Easter service at Galilee Baptist church. Easter isn't really the only time I go to church. We had a friend of my daughter and some of her husband's family join us and, all in all, had a great day. I met a new friend and we all visited and played games and just had lots of fun after the great meal.

Speaking of the great meal, my daughter served a recipe that I had never experienced, scalloped pineapple. That's what I want to share with you. It made a great side dish to go with the honey-baked ham, YUM.


SCALLOPED PINEAPPLE

1/2 cup margarine, melted
4 cups bread crumbs (we used King's Hawaiian Sweet bread)
1-1/2 cups sugar
3 eggs, beaten
1/2 cup evaporated milk
2 15 ounce cans of pineapple tidbits in juice, DO NOT DRAIN

Mix together and bake in a greased casserole dish
We used an 9" x 9" pyrex dish.
Bake 35 to 40 minutes at 350 degrees.

I know this sounds like pineapple bread pudding, but tastes nothing like any bread pudding. The bread isn't particularly noticible, but the pineapple and custard are excellent. Don't know that I'll just use it to accompany ham. Might try is as dessert with a little whipped cream topping.

Tuesday, March 8, 2011

Favorite Swiss Steak

My apologies for taking so long to post again. We have been out of a service area for my mobile broadband, lolling on the lake for a couple of months. Hope everyone had a great holiday season and now we're ready to cook something different. This is my recipe for Swiss Steak.

SWISS STEAK

2 pounds (or so) of steak (best if using less tender cuts of round or chuck, The oven and the tomatoes tenderize it nicely.)
Salt & pepper to taste. I also sprinkle with a little garlic powder and thyme.
Pound with steak hammer (or edge of a saucer), pounding into the steak as much flour as possible. Brown steak in small amount of cooking oil(do not fully cook). I like Canola oil. Remove from skillet and place in one layer in a baking pan or oven safe Pyrex.

Saute using 1 tablespoon of remaining oil:
1 diced onion
1 chopped green bell pepper
add:
1 can of diced tomatoes
1 can of original Ro-tel tomatoes with green chilis
(if Ro-Tel are not available can substitie anothe can of diced tomatoes and a couple of chopped jalapenos)
Pour tomato mixture over browned steak,cover with foil and bake at 350 for 45 minutes to 1 hour.

Serve over hot rice. I get a little lazy with the rice and use Uncle Ben's Long Grain and Wild rice, and microwave it. I really like the seasonings in the rice with the flavor of the Swiss Steak. Should serve six, or lefteovers are great, reheated.
Hope you all enjoy it

Friday, December 31, 2010

Hot Buttered Rum at Home

Since Mom already kicked off the holiday season with some of her own homemade favorites, I thought I'd contribute my own recipe for Hot Buttered Rum batter. I'm not normally a rum drinker, but discovered this particular elixir after a long day spent snowboarding, some years ago.

So here's how you make your own incredibly scrumptious and decadent batter, at home. Then you don't have to worry about driving, afterwards, either...

As always, feel free to experiment with your own variations, add a little extra of whatever you like, or take out whatever you don't.


HOT BUTTERED RUM BATTER (CREAM STYLE)

1 qt good vanilla ice cream, thawed til gooey (For this, I like to use the kind made w/ eggs, and good like Schwan's -- not quite as good as Haagen-Daaz)
1 lb. softened, salted butter
1 lb. brown sugar
1 lb.powdered sugar
2 tsp ground nutmeg
1 T ground cinnamon

All amounts are approximate.


Cream the sugar and spices into the soft butter, then cream into the softened ice cream. Generally, I'll warm everything in a double boiler until the mixture is smooth and there's no grainy bits of the brown sugar, because it's completely dissolved. Sometimes, I'll omit the confectioner's sugar, because I don't happen to have any in the cupboard, too, for that matter -- so I just add in a little more brown sugar, instead.


You take a big dollop of the batter (more or less depending on taste) and plop into your favorite mug. Pour a healthy splash of Myers Dark Rum over it (at least an ounce, I prefer two) Fill with boiling water, then stir gently - you want that foamy goodness on top to sip rum through.

Top with a sprinkle of fresh-ground nutmeg, and/or garnish with a cinnamon stick, if you feel a little fancy.

Repeat until you need to put your head down somewhere soft. Store the leftover batter in your fridge—it'll generally keep a lot longer than it will actually last. If you have worries on that score, though, you can store it in the freezer quite easily and almost indefinitely.

Happy New Year, eveyone!

Saturday, December 25, 2010

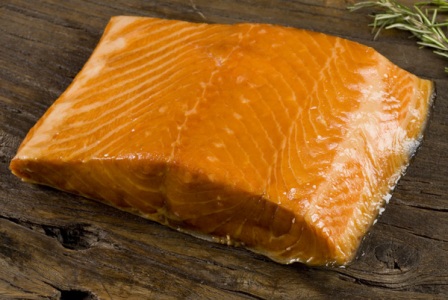
Smoked Salmon Chowder (local to Boundary Bay Brewpub)

There's a local Brewpub called Boundary Bay that makes the most incredible Smoked Salmon Chowder. And since we did a roasted chicken with cornbread dressing and all the other trimmings just last month, we decided our Christmas meal might be a good bit simpler, leaving us time for a hike this afternoon.

Here's the infamous chowder recipe—slightly modified—since we're not feeding an army, we've scaled the portions down from the original recipe linked above. Measurements are approximate--so feel free to adjust as needed:

2 cups diced potatoes
1 cup diced carrots
1 1/2 cups onions, chopped
1/2 cup celery, chopped
2 T fresh chopped garlic
1 1/2 cup clam juice
1 1/2 cup white wine (we're using SilverLake Sauvignon blanc)
1 tsp dried thyme
1/2 cup (1 stick) butter
1/2 cup flour
3 cups heavy cream
1 cup smoked salmon (approx) I like VIS Seafoods' traditional smoked salmon


In a large, heavy-bottom Dutch oven, sauce or stock pan (5 quart is the size I use) combine the wine, clam juice, and thyme. Add the diced vegetables and boil until tender. Reduce heat to a simmer.
Warm the cream (you can actually do this in a microwave - but be careful not to boil or scald, and if you're aghast at the calories, you can use whole milk). Melt the stick of butter, whisk the flour into the melted butter to make a roux, (keep your heat low, you're looking for white-to-blond roux, not darker—so be careful not to brown the butter or flour) and add in the warmed cream. 
Making sure the clam juice/wine/veggie mix is not actually boiling, add the cream roux into the soup pot, stirring gently. Add the flaked salmon. Let simmer another 15 minutes or so, then serve. This is marvelous in bread bowls, or with crusty hunks of warmed baguette, and the rest of that bottle of white wine you used in the chowder stock.


Have a very Merry Christmas, everyone!

Friday, December 10, 2010

Dessert Again

The weather has warmed back up here in Texas, 72 degrees on the 10th of December, WOW!! So, I'm not thinking hot drinks, today. I do have a wonderful recipe for a cake that is great for the holidays when you're having friends over. Don't want to do this for just a few people. It is super rich and about a thousand calories per bite, but double yummy. it really easy and pretty impressive tasting. Company raves about it. As a matter of fact, the recipe is called "Better Than Sex Chocolate Cake", but I'm not sure about that claim. You be the judge.

BETTER THAN SEX CHOCOLATE CAKE

One box of German chocolate cake mix (mix & bake according to the package
directions,in a 9"x13" pan.)
1 can of Eagle Brand condensed milk
1 jar of caramel ice cream topping
1 bag toffee chips
1 tub of Cool Chip (can use low fat and sugar free)

When the cake is baked and cooled, poke holes in it over the entire surface about 1 inch apart. You can use a wooden spoon handle or use your fingers. Nobody will know.

Pour the can of Eagle Brand over the entire surface and allow to soak in.

Top that with the caramel topping and sprinkle with toffee bits to your preference.

Frost that with the Cool Whip and sprinkle on more toffee bits.

Chill in refrigerator for a couple of hours before cutting.

Be prepared for it to disappear quickly.


This one is okay for Kids, except for a possible sugar high.

Wednesday, December 8, 2010

As promised, here is my Kahlua recipe. Easy, inexpensive, and very good. Also not recommended or suitable for children. Try a little Kahlua and cream over ice. Or my favorite way to use it is as a topping for chocolate ice cream. It's also good in coffee or hot chocolate.

Homemade Kahlua
Ingredients:
2 cup water
1 ¼ cup sugar
1 ½ T instant coffee (I use instant espresso powder)
1 ½ T vanilla extract
1 tsp caramel syrup coffee flavoring
1 tsp rum extract (or real rum)
2 cup vodka
Directions:
· Heat first three ingredients over medium heat until sugar is completely dissolved
· Stir vodka and flavorings
· Cover until cooled to room temperature (very important to cover to keep the alcohol from evaropating.)
· Store in dark colored, screw-top 750 ml bottle
· Cure for 30 days(If you can stand it)

Baked Ziti

Gotta love Italian food too. Here's a requested recipe. Love it when you all read the blog and comment.

EASY BAKED ZITI

1 16oz pkg. ziti
2 teaspoons extra virgin olive oil
28 ounces pasta sauce (okay to use bottle sauce or make your own if you don't mind the extra work)
1 egg
1/4 cup grated parmesan cheese (either fresh grated or the other kind)
1 cup ricotta cheese (can substitute cottage cheese if necessary)
6 ounces mozzerella cheese, grated
Non stick cooking spray

Preheat oven to 350 degrees. Make ziti according to directions on the package, be careful not to overcook. [...because nobody likes soggy noodles -- ed. note]
Drain well.
In a bowl, mix pasta and olive oil until pasta is well coated.
Spray a baking dish with nonstick cooking spray.
Pour pasta sauce in the bowl with the pasta and oil and mix well. spread 1/2 the pasta mixture into the baking dish.

Mix the egg, ricotta and Pamesan cheese in a separate bowl. Spoon this mixture over the pasta and top with 1/2 of the mozzerella cheese. Spread the remaining pasta mixture for a second layer. Sprinkle with the remaining mozzerella over the top.

Bake at 350 degrees for about 20 minutes until bubbling hot. Serves about 6.

Monday, December 6, 2010

Warm Bread Pudding w/Bourbon Sauce

Since I confessed to the world that I like bourbon, I probably should share another favorite recipe. This is a New Orleans Style Bread Pudding with Bourbon Sauce. YUM!!
After typing this out, I'm going to make a batch, just for me, cause I can.


BREAD PUDDING

1 pound of French Bread (the firmer,the better)
3-1/4 cups milk
3 eggs
2 teaspoons vanilla
3/4 cup sugar
1/4 teaspoon cinnamon
1/4 cup pecans
1/4 cup raisins (raisins and pecans are optional)

Tear the bread into medium pieces (about 1 inch cubes). Add cinnamon and sugar, toss lightly. Mix milk and lightly beaten eggs and vanilla and add to bread mixture. Place 1/2 of mixture in buttered casserole dish. Layer pecans and raisins, if used. Top with rest of mixture. Bake at 350 degrees for 30 minutes of until lightly browned. Serve warm with warm Bourbon sauce. (If you have leftovers, it microwaves great for re-warming).

BOURBON SAUCE

1 cup sugar
6 tablespoons melted butter
1/2 cup buttermilk
1/2 teaspoon baking soda
1 tablespoon white corn syrup
1 teaspoon vanilla
1 Tablspoon Bourbon (I must confess, I find a tablespoon rather insipid. I use a good 1/4 of a cup).
What can I say, I like the taste of Bourbon, Also, I usually double the recipe, because the sauce is wonderful. The bread pudding is good, but, just something to pour the sauce on.

This is also not necessarily recommended or suitable for children. While the alcohol boils away, it still has the wonderful bourbon flavor.

In a sauce pan, mix all the ingredients. Bring to a boil and boil for one minute. Serve warm over warm bread pudding.

Sunday, December 5, 2010

Cold Weather Thoughts

With the onset of the Holiday Season and colder weather, I'm thinking fireplace and warm drinks. One of my favorite warm drinks is Irish coffee. There is nothing like sitting by the fireplace, with a warm Irish Coffee, watching 'Miracle on 34Th Street', or 'A Christmas Carol'. Yep, you guessed it, I'm a Christmas junkie. I start listening to Christmas music on Thanksgiving Day and watching my collection of Christmas DVD's until my husband threatens to demolish the TV. But, I remind him it's only one season of the year and what a glorious Reason for the season, and pass him another cup.
I want to share my recipe for Irish Creme for those of you who enjoy a warm pick me up on occasion.

IRISH CREME

14 oz Eagle Brand milk
4 whole eggs
1 cup dark rum OR brandy OR bourbon (I like bourbon)
2 Tablespoons strong, cold coffee (I have used 1 tablespoon of instant coffee powder)
1 Tablespoons chocolate syrup
2 teaspoons vanilla extract
2 teaspoons almond extract

INSTRUCTIONS

Combine all ingredients in blender. Mix 30 seconds on medium. Bottle and refrigerate - keeps up to 3 weeks.

Add for strength desired to cup of hot coffee and enjoy. Also good over ice with a little milk or cream added. This is NOT suitable or recommended for children.

Sunday, October 17, 2010

Mexican Cornbread, redux

Remember last year, when we talked about Mexican Cornbread? Yep. That's what's for dinner.

I've been out at the barn, trimming horses and giving riding lessons all day. When I got home I was tired, stiff, cold, and it just sounded SO GOOD.

Happy Autumn, everyone. I love this time of year best of all, so I expect I'll be posting rather more than usual...at least until the winter rains set in on us.

Wednesday, September 15, 2010

Never Fail Chocolate Cake

Wow! Where did summer go? It's canning season for those of us who do that. I don't do as much as I used to when my children were at home, but there's always something I like home canned. This year, we gathered buffalo berries. They've been in short supply for the last couple of years due to lack of moisture in our area. Buffalo Berry Jelly is always a treat. We did make jelly and will be sending to the girls. I also made Wild Huckleberry Jam, yum, my favorite. Our tomatoes are producing, so I've been canning tomato juice cocktail. Now it 's time for my 30 day friendship cake. Doing all this doesn't leave a lot of energy or time for actual cooking of meals and desserts.

One of my favorite recipes that doesn't take a lot of energy or time, while I'm being productive, is the Never Fail Chocolate Cake. Super easy. Just dump all the ingredients in a bowl and mix and cook. No extra sifting or blending needed.

It truly is never-fail. I remember once in my younger years, I had mixed it up and put it in the oven and about ten minutes later suddenly remembered I had forgotten to put in the soda. I quickly dumped the batter back into a bowl , added the soda and put it back in to bake. It baked just fine with no problems, raised nicely and tasted wonderful. Being chocolate, what more could a chocoholic ask for. Of course, this is not the recommended method for baking. This is also a good recipe to start kids out on for guaranteed success. Try it and enjoy.

NEVER FAIL CHOCOLATE CAKE

1 cup hot water
1 cup sour milk (if you don't have sour milk, add 1 tablespoon vinegar OR lemon juice to sweet milk, stir and let sit a minute)
1cup butter or shortening
2 cups flour
1/2 cup cocoa
2 cups sugar
2 teaspoons soda
2 teaspoons vanilla
2 or 3 eggs (3 if you have them, but 2 will work, so don't run to the store for an egg.)

Mix all ingredients together and bake in a greased, floured 9x13 pan at 350 degrees for 30 to 35 minutes until tooth pick comes out clean.
If you turn out while hot, onto waxed paper, it makes good brownies, too. I usually just go for cake and frost with the following frosting. (my husband doesn't like brownies, but really goes for cake with frosting.)

FROSTING FOR NEVER FAIL CAKE

1/2 cup shortening or oil
1/3 c milk
1-1/2 teaspoons vanilla
3-1/2 cups powdered sugar
1/2 cup cocoa
1/4 teaspoon salt

Sift dry ingredients into moist ingredients and mix well. Add more powdered sugar or milk, if needed, to make spreading consistency.

Sunday, August 22, 2010

Summer Salad

It's been a while, but I have a fun recipe for a salad that is perfect for a cookout, picnic or at the table. Before Summer is over, I wanted to share this easy recipe. Especially good with hot dogs or burgers. It is easy and very tasty and usually kids love it because it is full of fritos.

CORN CHIP SALAD

1 can kidney beans-do not drain
1/4 of an onion shopped
1/4 of a green pepper chopped
1/2 tomato chopped
1/2 small bottle Catalina dressing

Mix all ingredients together and leave to marinate for a couple of hours or more.
About 1/2 to 1 hour before serving, add 1/2 bag of Frito Corn Chips.

You can adjust the vegies in the salad if you prefer more than are called for.

Friday, August 13, 2010

Summertime Slaw!

Let's talk about cool summer dishes. I grew up with coleslaw, and always liked it. These days, I'm more likely to swing by KFC and pick up a quart of their slaw than to make it at home, though, and I recently realized that just wasn't working for me. In part, because I really like to know what's in the food I'm eating.

Lucky for me, coleslaw is one of those dead-easy dishes that will forgive you while you practice. In fact, the toughest part of slaw is the dressing. Once you've added a yummy, zesty slaw dressing to your recipe repertoire.

Let's talk first about a couple of decisions you'll need to make. I'm a huge fan of shredding my own cabbage, and shredding it with a knife. I'll happily use the grater for the carrots, jicama, or anything else I decide to add to my slaw, but I hand-shred the cabbage. I do this for a couple of reasons:
  • It pleases me, that repetition, rhythm, and fine degree of control that I get from using a sharp knife to yield exactly the desired consistency and texture of the shredded cabbage.
  • The slaw-mix you can buy, pre-shredded in the plastic bag? Dried-out, tasteless, expensive.
  • That high-end Cuisanart food processor collecting dust in the back of the high cupboard-you-never-use, over the fridge? Reduces lovely crisp cabbage to eensy-weensy shreds, and it's a pain to clean up.

So you're essentially going to fill a big bowl with assorted shredded veggies. I like to use cabbage, maybe a little purple cabbage for color, carrots, some fresh green onion, and maybe some jicama or kohlrabi, if it's available. You might find this especially pleasing if you think about the combination of colors and textures, as well as thinking about the combination of flavors. You can vary the textures by varying the sizes of shreds, and consider tossing in a handful of toasted almond slivers, pecans, or hazelnut crumbles. (The bowl of slaw pictured above is topped with a sprinkle of toasted pecan crumbles and fresh basil leaves.) If you're looking for ways to cut sugar and fat in your diet, consider adding an apple to sweeten your slaw, peeled and cored and shredded.

Another set of options to consider is how do you want to serve your slaw? If you have a little leftover steak, some salad shrimp, or maybe a nice piece of smoked salmon, consider adding that in, too, chopped or shredded as needed. You'll have a delicious and robust slaw to serve as a sandwich on crusty rolls, or in a wrap.

Now, let's talk about dressings. I grew up with traditional mayonnaise and vinegar-based slaw dressings. Neither of those is particularly difficult. The following options will dress between two and three quarts of shredded veggies waiting naked in a big bowl.


  • Use about a cup and a half of good quality mayo 
  • Add a splash of vinegar or lemon juice (somewhere between two tablespoons and a quarter of a cup),
  • Add a tablespoon or so of sugar, if you like your slaw a little sweeter 
  • Add coarse-ground pepper, according to taste.  


You can experiment by adding other flavors, as well. Try experimenting with adding horseradish or coarse-ground mustard; perhaps even try some fennel, roasted garlic, or olives.

If a vinegar dressing is more to your taste, consider the kind of vinegar you'd like to use; perhaps you have a lovely balsamic or wine vinegar? Plain old cider vinegar can make a tangy and delicious dressing, too, though.

Whisk together in a bowl:

  • A half cup of good vinegar
  • A generous dollop of honey (a couple of tablespoons to a quarter of a cup)
  • A couple of spoons of stone-ground mustard
  • A pinch of celery seed
  • A little coarse pepper 
  • A couple of tablespoons of good-quality olive oil

As with the mayonnaise-based dressing, consider experimenting with other flavors you love and appreciate, like roasted garlic, red pepper, fennel, or a pinch of fresh-ground nutmeg.

Finally, the yogurt slaw dressing I've been promising people I'd post:
  • Toss your shredded veggies in about a quarter cup of fresh lemon juice
  • In another bowl, start with a cup or so of Greek-style yogurt—if this isn't readily available, it's pretty simple to make your own: simply pour a container of ordinary plain yogurt into a very fine mesh strainer over a bowl. If you con't have a chinois or cheesecloth, simply line your colander with a coffee filter. Let it drain overnight (in the refrigerator), discard the moisture that drains off and use the remaining yogurt.
  • Add a couple of tablespoons of honey, if you like a sweeter slaw. (I usually skip this, since I don't have much of a sweet tooth.)
  • A couple of tablespoons of coarse-ground mustard
  • A tablespoon or two of good-quality olive-oil (helps the dressing cling and it's actually good for you) 
  • Coarse-ground pepper and a little salt, to taste.
  • Whisk smooth, then add to your shredded veggies and mix it all together with a big wooden spoon

It's that simple. Cook with stuff that's fresh. Experiment. Taste as you go. And don't be afraid.

Friday, July 2, 2010

Hurray for Summer, and Happy 4th of July Potluck!

Welcome, and I hope everyone's having a lovely weekend, filled with love, good food, family, and fun. Here's hoping the weekend finds everyone well and happy! Welcome to our first ever blog potluck, and thanks so much for sharing your favorite summer celebration recipes and memories of loved ones.

UPDATE:
We have another dish to share, this one from Haggis, over on What do you mean, I should start a blog? Haggis brings us a recipe for 1-2-3 Lemon Sherbet:
Strictly speaking, this should be called Momma and Poppa Haggis' Homemade 3-2-1 Lemon Sherbet because my sainted mother always got the ingredients ready, while my father always took care of freezing the mixture using the old hand-cranked ice cream maker. He'd pack it with ice, rock salt and a little water, then he'd burn off about a bizillion calories cranking away until it became sherbet.
Haggis says to enjoy his recipe for homemade sherbet with relish, but with people relish not pickle relish. I'm pretty sure he doesn't intend you should actually make relish out of people, because he didn't include a recipe for that part . . . But he does write horror, and with Haggis, it never pays to take these things for granted.


I got a very funny link to add, from Jamie Mason: Picnic: Or Why The Hell Are We Eating Outside?
There are a number of sturdy and standard plans we entertain that don’t hold up nearly as well once they’re launched into reality.  It’s one of the amusing things about being human.  And summer is particularly prone to showing up our big ideas for being wobbly-at-best.  For instance, the belly-flop.  Drenching the coals with lighter fluid just to get things going.  The Slip n’ Slide.  The keg stand.  The Slip n’ Slide after a keg stand.  The Speedo. 

Maria Zannini shares memories and techniques for Mexican barbacoa, over on her blog, Tales of Otherworlds:
Mexican barbeque is called barbacoa, and it's not your typical Texan fare.
Barbacoa is basically slow cooked beef. Traditionally, it is cooked in a pit, wrapped in maguey or banana leaves where the smoke and steam seal in the juices and imbue it with a flavor that's out of this world.

Marguerite Butler shares a wonderful recipe and memories of her grandmother, Fresh From the Garden, on Marguerite Says:
My grandmother was a fantastic gardener, but she didn't eat fresh vegetables.  Nana was a product of the great depression and all things were to be hoarded, even food.  Some of my earliest memories are of summer harvests and the inevitable canning process.  With only a tiny icebox, she didn't freeze things.  She canned them.  For days on end, the pressure canner and pots of boiling water roiled nonstop.  I'm talking about a Texas summer with only a little swamp cooler unit to take the sting out of the heat.

My own mom posted about Summers and Picnics, celebrating Independence Day, watermelon-rind pickles, and growing up in Texas in the 1940s:
Mom would pack up a scrumptious lunch with Southern fried chicken, roasting ears of corn to cook on the grill, potato salad, coconut cake (my Dad's favorite), and a huge watermelon. Usually we'd head for the Brazos river to spend the day, or sometimes two. Dad and the boys would fish or put out set lines for catfish. When we stayed for a couple of days, Mom would cook up the catfish and fry potatoes on the campfire. It just didn't get any better than that.
Lisa Spangenberg shares memories of her father, and the recipe for his coleslaw, on A Digital Medievalist's Commonplace Blog. I cannot help but observe again the joy and sweetness we carry around the associations we all have between food, memory, and the people beloved to us:
I loved his coleslaw. There were two things that made his coleslaw different; one, he didn't overuse mayonnaise, and two, he added nuts. At first, it was slivered almonds, or pecans, but later, after he retired, he started using macadamia nuts. I can remember him standing over the cutting board with half a head of green cabbage, and shredding it with a knife. He didn't like to use the food processor. He'd add grated carrots, a little high quality mayo, salt and pepper to taste, and last of all, the nuts.

From Trish Stewart, back from a shared camping vacation with a bunch of friends:
Jamie asked for my green bean recipe. I sent this to her, but I figured I'd forward it/share it with you guys too, and Mac, since you thought it sounded evilly delicious, I'm copying you. (try it out and feel free to share it on your cooking blog if you approve of it) (minus the extra jibberish, of course)

The runamuck version.
Get fresh green beans. I don't know how many you're feeding so all of this is going to be guessing on my end.
snip the ends (drinking all the while). soak them for a bit. (continue drinking). 
wash your hands, damn it!
put some chicken broth in the water you're boiling the beans in. I used 3 cups with way too much water at Runamuck. you could probably go half water half broth for the best result. you don't need to salt the water.
drink!
get a good boil before you put them in. while you're waiting for the water to boil fry some bacon (in a really big skillet because all the beans are going in there). 

For the amount I made at Runamuck I used 6 or 8 slices of thick-cut bacon. (drink while the bacon is cooking and you're waiting for your water to boil)
wash your hands!
Take the bacon out, and set it aside, leave the grease. 
Chop an onion put it in the bacon grease on low about 5 minutes before your half-cooked beans are ready to go in. 
wash your hands again, and take another drink. (be sure you wash your hands before you take a drink because you don't want onion bacon beverage, do you?)
Chop your cashews while you wait. (cashews..how many? shoot...how many look like enough? And really, is there ever enough?)
Use tongs to get the beans outta the water. Put the beans in the pan with the bacon drippings and onion.
add about a cup (depending on how many, maybe 2) of broth/water, salt and pepper.
Again, depending on how many beans, add a couple tablespoons of butter. (at runamuck I probably added 3 tablespoons of butter, and I took another drink) 
let them cook until they are tender.
When they are done and the broth/butter/bacon drippings has reduced to a thick sauce add chopped cashews. I usually just throw in a few handfuls maybe 1/4 cup? ah....probably more than that. how's it look?
they'll get coated and toasty.
drink for the toasty cashews!
crumble up the cooked bacon.
wash your hands!
take a drink.
add the crumbled bacon (it stays crispy if you wait until the end to put it in) -->and truly this genius requires you to drink again.
top it with crumbled bleu cheese.(however much you want)
the longer it stays in the pan the gooey-er (is that a word? drink!) it'll be. 
and it does reheat well but the bleu cheese will melt entirely when you reheat it.
if you're taking it somewhere for a cookout maybe get it all done except for the bacon, bleu cheese and cashews.
if you do it that way, take the cooked beans and saucy-ness put it back in the skillet, get it hot, add the crumbled bacon, cashews and bleu cheese while you're there so you don't have to try to keep it warm and let the bacon get soggy).
drink su'more!
let me know if you have any questions about it. I just do it by taste and visual. (does that look like enough?) :)

The "extra gibberish" is far too much fun to leave off, Trish. It sounds like you all had an indecent amount of fun and amazing food at Camp Runumuck.

I'll continue posting links for everyone to enjoy as they continue trickling in. Have a wonderful weekend, everyone, and thank you so much for sharing your memories and recipes with us.

Tuesday, June 29, 2010

Summertime and picnics

I grew up in the 1940's during the post depression, WWII era. Even with the turmoil our nation was in, my parents always took time to make sure my 3 brothers and I appreciated the 4th of July holiday and what it stood for.

There was always a picnic with all the goodies. Mom would pack up a scrumptious lunch with Southern fried chicken, roasting ears of corn to cook on the grill, potato salad, coconut cake (my Dad's favorite), and a huge watermelon. Usually we'd head for the Brazos river to spend the day, or sometimes two. Dad and the boys would fish or put out set lines for catfish. When we stayed for a couple of days, Mom would cook up the catfish and fry potatoes on the campfire. It just didn't get any better than that.

One thing I especially remember is, when we ate the watermelon, Mom would always collect the rind and put it in the cooler to take home. We were taught to use everything that was provided and not to waste. After we got home, Mom would use the rind of the watermelon to make Watermelon Pickles. We enjoyed our 4th of July bounty into the winter.

Watermelon Pickles
The rind of one large watermelon.
Peel and remove all green and pink portions from the rind.
Cut into one inch cubes and soak overnight in salt water (4 tablespoons of salt to 1 quart of water)
Drain and cover with fresh water aand cook until almost tender

Drain the watermelon and make a syrup of:
8 Cups sugar
4 cups vinegar
8 teaspoons whole cloves
16 sticks of cinnamon
1teaspoon mustard seed
(Tie the spices in a cheesecloth bag)

Heat the syrup and spices to boiling and allow to set for 15 minutes.
Add the drained rind and cook until rind is transparent.
A few minutes befor boiling time is up, you may add enough red or green food coloring to give the desired color to the pickles. This is optional, Mom never did, so I never do. Pack into hot sterilized canning jars to within 1/2" of top. Put on cap and screw band firmly tight. Process in Boiling Water Bath for 5 minutes. Should yield 6 pints.

Adding the red or green food color could make a festive touch to serve at Christmastime. You would still be enjoying the 4th of July holiday in December.