Showing posts with label home cooking. Show all posts

Wednesday, June 22, 2011

Recipes: Antique and Modern

I just got back from the Pacific Northwest and spending a couple of week with Mac. It is good to keep in touch, but especially good to touch. It was a little cool, but all in all, very nice weather.

I shared a recipe with Mac and would like to share it with the blog. I think it is a lot of fun to know how our ancestors cooked and equal fun to convert those recipes.

This is simple recipe for a simple, inexpensive dessert. Indian pudding, then and now.

INDIAN PUDDING (1828 recipe)

1 cup (not quite full) molasses, 1 cup (not quite full) cornmeal, 1 egg, 1 heaping spoonful of butter or fat, salt, ginger or cinnamon to taste, all beaten together. Full quart of sweet milk put on to boil and the ingredients stirred in. Take from fire and add not quite a full cup of cold milk. Pour into pan onto lumps of butter. Bake one hour. Extra good.

This is the way they did it. I tried it like this.

INDIAN PUDDING (today's recipe)

4 cups plus 2/3 cup milk
2/3 cup yellow cornmeal
3/4 cups molasses (a New England friend uses Maple syrup, yummy)
2 eggs beaten
1 tablespoon butter
1/2 teaspoon salt
1 teaspoon ginger or cinnamon (I tried using both together, taste similar to pumpkin pie)

Preheat oven to 275 degrees F. Heat 3 cups of milk in top of double boiler (can use microwave). Mix 1 cup of milk and cornmeal. Stir into hot milk. Combine the molasses, beaten eggs, butter salt and spice and add to cornmeal mixture. Cook over low heat intil mixture thickens slightly. Remove from heat and add remaining 2/3 cup milk. Pour into a buttered 2 quart casserole and bake 2 hours. Serve warm or cool with whipped cream

*NOTE FROM MAC:
This is the sort of thing Mom would do with us, when I was little. We'd look at old recipes for pies, cakes, pancakes, bread -- anything you can think of, really, that people have eaten for generations. Then we'd make the recipe together, and experiment with ingredients and amounts.  So it was extra fun and a little like time traveling to make Indian Pudding together in my mom's RV kitchen.*

Thursday, May 5, 2011

Yummy Scalloped Pineapple

I recently had the joy of spending Easter in Denver with two of my daughters and their families (Mac couldn't make it, bummer). Anyway, we had a lovely Easter dinner after the beautiful Easter service at Galilee Baptist church. Easter isn't really the only time I go to church. We had a friend of my daughter and some of her husband's family join us and, all in all, had a great day. I met a new friend and we all visited and played games and just had lots of fun after the great meal.

Speaking of the great meal, my daughter served a recipe that I had never experienced, scalloped pineapple. That's what I want to share with you. It made a great side dish to go with the honey-baked ham, YUM.


SCALLOPED PINEAPPLE

1/2 cup margarine, melted
4 cups bread crumbs (we used King's Hawaiian Sweet bread)
1-1/2 cups sugar
3 eggs, beaten
1/2 cup evaporated milk
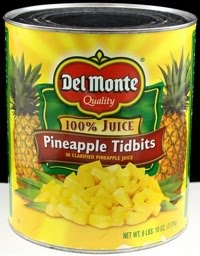
2 15 ounce cans of pineapple tidbits in juice, DO NOT DRAIN

Mix together and bake in a greased casserole dish
We used an 9" x 9" pyrex dish.
Bake 35 to 40 minutes at 350 degrees.

I know this sounds like pineapple bread pudding, but tastes nothing like any bread pudding. The bread isn't particularly noticible, but the pineapple and custard are excellent. Don't know that I'll just use it to accompany ham. Might try is as dessert with a little whipped cream topping.

Tuesday, March 8, 2011

Favorite Swiss Steak

My apologies for taking so long to post again. We have been out of a service area for my mobile broadband, lolling on the lake for a couple of months. Hope everyone had a great holiday season and now we're ready to cook something different. This is my recipe for Swiss Steak.

SWISS STEAK

2 pounds (or so) of steak (best if using less tender cuts of round or chuck, The oven and the tomatoes tenderize it nicely.)
Salt & pepper to taste. I also sprinkle with a little garlic powder and thyme.
Pound with steak hammer (or edge of a saucer), pounding into the steak as much flour as possible. Brown steak in small amount of cooking oil(do not fully cook). I like Canola oil. Remove from skillet and place in one layer in a baking pan or oven safe Pyrex.

Saute using 1 tablespoon of remaining oil:
1 diced onion
1 chopped green bell pepper
add:
1 can of diced tomatoes
1 can of original Ro-tel tomatoes with green chilis
(if Ro-Tel are not available can substitie anothe can of diced tomatoes and a couple of chopped jalapenos)
Pour tomato mixture over browned steak,cover with foil and bake at 350 for 45 minutes to 1 hour.

Serve over hot rice. I get a little lazy with the rice and use Uncle Ben's Long Grain and Wild rice, and microwave it. I really like the seasonings in the rice with the flavor of the Swiss Steak. Should serve six, or lefteovers are great, reheated.
Hope you all enjoy it

Saturday, December 25, 2010

Smoked Salmon Chowder (local to Boundary Bay Brewpub)

There's a local Brewpub called Boundary Bay that makes the most incredible Smoked Salmon Chowder. And since we did a roasted chicken with cornbread dressing and all the other trimmings just last month, we decided our Christmas meal might be a good bit simpler, leaving us time for a hike this afternoon.

Here's the infamous chowder recipe—slightly modified—since we're not feeding an army, we've scaled the portions down from the original recipe linked above. Measurements are approximate--so feel free to adjust as needed:

2 cups diced potatoes
1 cup diced carrots
1 1/2 cups onions, chopped
1/2 cup celery, chopped
2 T fresh chopped garlic
1 1/2 cup clam juice
1 1/2 cup white wine (we're using SilverLake Sauvignon blanc)
1 tsp dried thyme
1/2 cup (1 stick) butter
1/2 cup flour
3 cups heavy cream
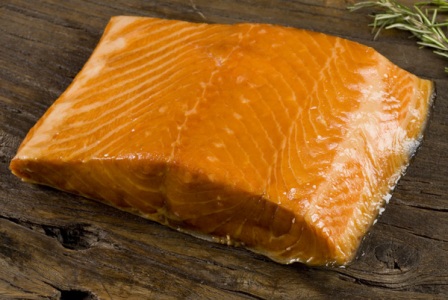
1 cup smoked salmon (approx) I like VIS Seafoods' traditional smoked salmon


In a large, heavy-bottom Dutch oven, sauce or stock pan (5 quart is the size I use) combine the wine, clam juice, and thyme. Add the diced vegetables and boil until tender. Reduce heat to a simmer.
Warm the cream (you can actually do this in a microwave - but be careful not to boil or scald, and if you're aghast at the calories, you can use whole milk). Melt the stick of butter, whisk the flour into the melted butter to make a roux, (keep your heat low, you're looking for white-to-blond roux, not darker—so be careful not to brown the butter or flour) and add in the warmed cream. 
Making sure the clam juice/wine/veggie mix is not actually boiling, add the cream roux into the soup pot, stirring gently. Add the flaked salmon. Let simmer another 15 minutes or so, then serve. This is marvelous in bread bowls, or with crusty hunks of warmed baguette, and the rest of that bottle of white wine you used in the chowder stock.


Have a very Merry Christmas, everyone!

Wednesday, December 8, 2010

Baked Ziti

Gotta love Italian food too. Here's a requested recipe. Love it when you all read the blog and comment.

EASY BAKED ZITI

1 16oz pkg. ziti
2 teaspoons extra virgin olive oil
28 ounces pasta sauce (okay to use bottle sauce or make your own if you don't mind the extra work)
1 egg
1/4 cup grated parmesan cheese (either fresh grated or the other kind)
1 cup ricotta cheese (can substitute cottage cheese if necessary)
6 ounces mozzerella cheese, grated
Non stick cooking spray

Preheat oven to 350 degrees. Make ziti according to directions on the package, be careful not to overcook. [...because nobody likes soggy noodles -- ed. note]
Drain well.
In a bowl, mix pasta and olive oil until pasta is well coated.
Spray a baking dish with nonstick cooking spray.
Pour pasta sauce in the bowl with the pasta and oil and mix well. spread 1/2 the pasta mixture into the baking dish.

Mix the egg, ricotta and Pamesan cheese in a separate bowl. Spoon this mixture over the pasta and top with 1/2 of the mozzerella cheese. Spread the remaining pasta mixture for a second layer. Sprinkle with the remaining mozzerella over the top.

Bake at 350 degrees for about 20 minutes until bubbling hot. Serves about 6.

Sunday, August 22, 2010

Summer Salad

It's been a while, but I have a fun recipe for a salad that is perfect for a cookout, picnic or at the table. Before Summer is over, I wanted to share this easy recipe. Especially good with hot dogs or burgers. It is easy and very tasty and usually kids love it because it is full of fritos.

CORN CHIP SALAD

1 can kidney beans-do not drain
1/4 of an onion shopped
1/4 of a green pepper chopped
1/2 tomato chopped
1/2 small bottle Catalina dressing

Mix all ingredients together and leave to marinate for a couple of hours or more.
About 1/2 to 1 hour before serving, add 1/2 bag of Frito Corn Chips.

You can adjust the vegies in the salad if you prefer more than are called for.

Friday, August 13, 2010

Summertime Slaw!

Let's talk about cool summer dishes. I grew up with coleslaw, and always liked it. These days, I'm more likely to swing by KFC and pick up a quart of their slaw than to make it at home, though, and I recently realized that just wasn't working for me. In part, because I really like to know what's in the food I'm eating.

Lucky for me, coleslaw is one of those dead-easy dishes that will forgive you while you practice. In fact, the toughest part of slaw is the dressing. Once you've added a yummy, zesty slaw dressing to your recipe repertoire.

Let's talk first about a couple of decisions you'll need to make. I'm a huge fan of shredding my own cabbage, and shredding it with a knife. I'll happily use the grater for the carrots, jicama, or anything else I decide to add to my slaw, but I hand-shred the cabbage. I do this for a couple of reasons:
  • It pleases me, that repetition, rhythm, and fine degree of control that I get from using a sharp knife to yield exactly the desired consistency and texture of the shredded cabbage.
  • The slaw-mix you can buy, pre-shredded in the plastic bag? Dried-out, tasteless, expensive.
  • That high-end Cuisanart food processor collecting dust in the back of the high cupboard-you-never-use, over the fridge? Reduces lovely crisp cabbage to eensy-weensy shreds, and it's a pain to clean up.

So you're essentially going to fill a big bowl with assorted shredded veggies. I like to use cabbage, maybe a little purple cabbage for color, carrots, some fresh green onion, and maybe some jicama or kohlrabi, if it's available. You might find this especially pleasing if you think about the combination of colors and textures, as well as thinking about the combination of flavors. You can vary the textures by varying the sizes of shreds, and consider tossing in a handful of toasted almond slivers, pecans, or hazelnut crumbles. (The bowl of slaw pictured above is topped with a sprinkle of toasted pecan crumbles and fresh basil leaves.) If you're looking for ways to cut sugar and fat in your diet, consider adding an apple to sweeten your slaw, peeled and cored and shredded.

Another set of options to consider is how do you want to serve your slaw? If you have a little leftover steak, some salad shrimp, or maybe a nice piece of smoked salmon, consider adding that in, too, chopped or shredded as needed. You'll have a delicious and robust slaw to serve as a sandwich on crusty rolls, or in a wrap.

Now, let's talk about dressings. I grew up with traditional mayonnaise and vinegar-based slaw dressings. Neither of those is particularly difficult. The following options will dress between two and three quarts of shredded veggies waiting naked in a big bowl.


  • Use about a cup and a half of good quality mayo 
  • Add a splash of vinegar or lemon juice (somewhere between two tablespoons and a quarter of a cup),
  • Add a tablespoon or so of sugar, if you like your slaw a little sweeter 
  • Add coarse-ground pepper, according to taste.  


You can experiment by adding other flavors, as well. Try experimenting with adding horseradish or coarse-ground mustard; perhaps even try some fennel, roasted garlic, or olives.

If a vinegar dressing is more to your taste, consider the kind of vinegar you'd like to use; perhaps you have a lovely balsamic or wine vinegar? Plain old cider vinegar can make a tangy and delicious dressing, too, though.

Whisk together in a bowl:

  • A half cup of good vinegar
  • A generous dollop of honey (a couple of tablespoons to a quarter of a cup)
  • A couple of spoons of stone-ground mustard
  • A pinch of celery seed
  • A little coarse pepper 
  • A couple of tablespoons of good-quality olive oil

As with the mayonnaise-based dressing, consider experimenting with other flavors you love and appreciate, like roasted garlic, red pepper, fennel, or a pinch of fresh-ground nutmeg.

Finally, the yogurt slaw dressing I've been promising people I'd post:
  • Toss your shredded veggies in about a quarter cup of fresh lemon juice
  • In another bowl, start with a cup or so of Greek-style yogurt—if this isn't readily available, it's pretty simple to make your own: simply pour a container of ordinary plain yogurt into a very fine mesh strainer over a bowl. If you con't have a chinois or cheesecloth, simply line your colander with a coffee filter. Let it drain overnight (in the refrigerator), discard the moisture that drains off and use the remaining yogurt.
  • Add a couple of tablespoons of honey, if you like a sweeter slaw. (I usually skip this, since I don't have much of a sweet tooth.)
  • A couple of tablespoons of coarse-ground mustard
  • A tablespoon or two of good-quality olive-oil (helps the dressing cling and it's actually good for you) 
  • Coarse-ground pepper and a little salt, to taste.
  • Whisk smooth, then add to your shredded veggies and mix it all together with a big wooden spoon

It's that simple. Cook with stuff that's fresh. Experiment. Taste as you go. And don't be afraid.

Friday, July 2, 2010

Hurray for Summer, and Happy 4th of July Potluck!

Welcome, and I hope everyone's having a lovely weekend, filled with love, good food, family, and fun. Here's hoping the weekend finds everyone well and happy! Welcome to our first ever blog potluck, and thanks so much for sharing your favorite summer celebration recipes and memories of loved ones.

UPDATE:
We have another dish to share, this one from Haggis, over on What do you mean, I should start a blog? Haggis brings us a recipe for 1-2-3 Lemon Sherbet:
Strictly speaking, this should be called Momma and Poppa Haggis' Homemade 3-2-1 Lemon Sherbet because my sainted mother always got the ingredients ready, while my father always took care of freezing the mixture using the old hand-cranked ice cream maker. He'd pack it with ice, rock salt and a little water, then he'd burn off about a bizillion calories cranking away until it became sherbet.
Haggis says to enjoy his recipe for homemade sherbet with relish, but with people relish not pickle relish. I'm pretty sure he doesn't intend you should actually make relish out of people, because he didn't include a recipe for that part . . . But he does write horror, and with Haggis, it never pays to take these things for granted.


I got a very funny link to add, from Jamie Mason: Picnic: Or Why The Hell Are We Eating Outside?
There are a number of sturdy and standard plans we entertain that don’t hold up nearly as well once they’re launched into reality.  It’s one of the amusing things about being human.  And summer is particularly prone to showing up our big ideas for being wobbly-at-best.  For instance, the belly-flop.  Drenching the coals with lighter fluid just to get things going.  The Slip n’ Slide.  The keg stand.  The Slip n’ Slide after a keg stand.  The Speedo. 

Maria Zannini shares memories and techniques for Mexican barbacoa, over on her blog, Tales of Otherworlds:
Mexican barbeque is called barbacoa, and it's not your typical Texan fare.
Barbacoa is basically slow cooked beef. Traditionally, it is cooked in a pit, wrapped in maguey or banana leaves where the smoke and steam seal in the juices and imbue it with a flavor that's out of this world.

Marguerite Butler shares a wonderful recipe and memories of her grandmother, Fresh From the Garden, on Marguerite Says:
My grandmother was a fantastic gardener, but she didn't eat fresh vegetables.  Nana was a product of the great depression and all things were to be hoarded, even food.  Some of my earliest memories are of summer harvests and the inevitable canning process.  With only a tiny icebox, she didn't freeze things.  She canned them.  For days on end, the pressure canner and pots of boiling water roiled nonstop.  I'm talking about a Texas summer with only a little swamp cooler unit to take the sting out of the heat.

My own mom posted about Summers and Picnics, celebrating Independence Day, watermelon-rind pickles, and growing up in Texas in the 1940s:
Mom would pack up a scrumptious lunch with Southern fried chicken, roasting ears of corn to cook on the grill, potato salad, coconut cake (my Dad's favorite), and a huge watermelon. Usually we'd head for the Brazos river to spend the day, or sometimes two. Dad and the boys would fish or put out set lines for catfish. When we stayed for a couple of days, Mom would cook up the catfish and fry potatoes on the campfire. It just didn't get any better than that.
Lisa Spangenberg shares memories of her father, and the recipe for his coleslaw, on A Digital Medievalist's Commonplace Blog. I cannot help but observe again the joy and sweetness we carry around the associations we all have between food, memory, and the people beloved to us:
I loved his coleslaw. There were two things that made his coleslaw different; one, he didn't overuse mayonnaise, and two, he added nuts. At first, it was slivered almonds, or pecans, but later, after he retired, he started using macadamia nuts. I can remember him standing over the cutting board with half a head of green cabbage, and shredding it with a knife. He didn't like to use the food processor. He'd add grated carrots, a little high quality mayo, salt and pepper to taste, and last of all, the nuts.

From Trish Stewart, back from a shared camping vacation with a bunch of friends:
Jamie asked for my green bean recipe. I sent this to her, but I figured I'd forward it/share it with you guys too, and Mac, since you thought it sounded evilly delicious, I'm copying you. (try it out and feel free to share it on your cooking blog if you approve of it) (minus the extra jibberish, of course)

The runamuck version.
Get fresh green beans. I don't know how many you're feeding so all of this is going to be guessing on my end.
snip the ends (drinking all the while). soak them for a bit. (continue drinking). 
wash your hands, damn it!
put some chicken broth in the water you're boiling the beans in. I used 3 cups with way too much water at Runamuck. you could probably go half water half broth for the best result. you don't need to salt the water.
drink!
get a good boil before you put them in. while you're waiting for the water to boil fry some bacon (in a really big skillet because all the beans are going in there). 

For the amount I made at Runamuck I used 6 or 8 slices of thick-cut bacon. (drink while the bacon is cooking and you're waiting for your water to boil)
wash your hands!
Take the bacon out, and set it aside, leave the grease. 
Chop an onion put it in the bacon grease on low about 5 minutes before your half-cooked beans are ready to go in. 
wash your hands again, and take another drink. (be sure you wash your hands before you take a drink because you don't want onion bacon beverage, do you?)
Chop your cashews while you wait. (cashews..how many? shoot...how many look like enough? And really, is there ever enough?)
Use tongs to get the beans outta the water. Put the beans in the pan with the bacon drippings and onion.
add about a cup (depending on how many, maybe 2) of broth/water, salt and pepper.
Again, depending on how many beans, add a couple tablespoons of butter. (at runamuck I probably added 3 tablespoons of butter, and I took another drink) 
let them cook until they are tender.
When they are done and the broth/butter/bacon drippings has reduced to a thick sauce add chopped cashews. I usually just throw in a few handfuls maybe 1/4 cup? ah....probably more than that. how's it look?
they'll get coated and toasty.
drink for the toasty cashews!
crumble up the cooked bacon.
wash your hands!
take a drink.
add the crumbled bacon (it stays crispy if you wait until the end to put it in) -->and truly this genius requires you to drink again.
top it with crumbled bleu cheese.(however much you want)
the longer it stays in the pan the gooey-er (is that a word? drink!) it'll be. 
and it does reheat well but the bleu cheese will melt entirely when you reheat it.
if you're taking it somewhere for a cookout maybe get it all done except for the bacon, bleu cheese and cashews.
if you do it that way, take the cooked beans and saucy-ness put it back in the skillet, get it hot, add the crumbled bacon, cashews and bleu cheese while you're there so you don't have to try to keep it warm and let the bacon get soggy).
drink su'more!
let me know if you have any questions about it. I just do it by taste and visual. (does that look like enough?) :)

The "extra gibberish" is far too much fun to leave off, Trish. It sounds like you all had an indecent amount of fun and amazing food at Camp Runumuck.

I'll continue posting links for everyone to enjoy as they continue trickling in. Have a wonderful weekend, everyone, and thank you so much for sharing your memories and recipes with us.

Tuesday, June 29, 2010

Summertime and picnics

I grew up in the 1940's during the post depression, WWII era. Even with the turmoil our nation was in, my parents always took time to make sure my 3 brothers and I appreciated the 4th of July holiday and what it stood for.

There was always a picnic with all the goodies. Mom would pack up a scrumptious lunch with Southern fried chicken, roasting ears of corn to cook on the grill, potato salad, coconut cake (my Dad's favorite), and a huge watermelon. Usually we'd head for the Brazos river to spend the day, or sometimes two. Dad and the boys would fish or put out set lines for catfish. When we stayed for a couple of days, Mom would cook up the catfish and fry potatoes on the campfire. It just didn't get any better than that.

One thing I especially remember is, when we ate the watermelon, Mom would always collect the rind and put it in the cooler to take home. We were taught to use everything that was provided and not to waste. After we got home, Mom would use the rind of the watermelon to make Watermelon Pickles. We enjoyed our 4th of July bounty into the winter.

Watermelon Pickles
The rind of one large watermelon.
Peel and remove all green and pink portions from the rind.
Cut into one inch cubes and soak overnight in salt water (4 tablespoons of salt to 1 quart of water)
Drain and cover with fresh water aand cook until almost tender

Drain the watermelon and make a syrup of:
8 Cups sugar
4 cups vinegar
8 teaspoons whole cloves
16 sticks of cinnamon
1teaspoon mustard seed
(Tie the spices in a cheesecloth bag)

Heat the syrup and spices to boiling and allow to set for 15 minutes.
Add the drained rind and cook until rind is transparent.
A few minutes befor boiling time is up, you may add enough red or green food coloring to give the desired color to the pickles. This is optional, Mom never did, so I never do. Pack into hot sterilized canning jars to within 1/2" of top. Put on cap and screw band firmly tight. Process in Boiling Water Bath for 5 minutes. Should yield 6 pints.

Adding the red or green food color could make a festive touch to serve at Christmastime. You would still be enjoying the 4th of July holiday in December.

Friday, June 25, 2010

Family Traditions, Celebrations, and a Blog Potluck Invitation!

Holidays were huge fun, growing up, and the 4th of July was no exception. Not only because we got to blow things up in the driveway, but the fried chicken and potato salad, the chilled watermelon, and the fun of setting aside most of a day specifically to play—whether that meant taking the horses out,  having a water-balloon fight in the front yard, or the whole family packing a cooler and driving out to picnic under the shade of the cottonwoods in the coulee behind the house.

Part of learning to create home around myself, as an adult, was learning to honor that need to take a day off and just play. One of my favorite ways to spend any holiday is to gather up friends and acquaintances without plans, and incorporate them into the celebration. Since I don't have a big yard this year, I won't be doing a 4th of July barbecue, but I'm definitely thinking about gathering up friends and packing a cooler full of that aforementioned fried chicken and potato salad.

In that spirit, you are cordially invited to a virtual potluck celebration of family and friends and good food in time for the 4th of July weekend. If you'd like to post a link to this invitation for your own readers, please do! The more the merrier! I'll post a blog carnival round-up of everyone's posts, here, on July 2nd. 

You don't need to be a USian. Just share a favorite memory, a favorite summer recipe, or anything else summer-nostalgia-cooking related that you feel like posting about and sharing with everyone.  If you'll post a link in the comments, or email or PM your link to me in time to post the whole round-up on July 2nd, in time for the weekend. If you don't have a blog of your own, but you'd like to participate, just contact me and I'll put your piece up as a guest-post here on Creating Home.

Heh. Then someone else can volunteer to host the next one!

Monday, June 14, 2010

Hooray for Veggies!

One of the things I remember most fondly about my mother's kitchen is that us kids always tried at least one bite of something new. That thing where kids wrinkle up their faces and say "I don't like that!" when you know full well they've never tasted it before? There was no getting away with that, with my mom.

For example, let's talk about eggplant. (You'll also sometimes see it called aubergine, melongene or brinjal, depending on where in the great big world you're located.)

Now, eggplant is a gorgeous creation, plump and purple and slightly alien-looking, with a flavor that's delicately reminiscent of fried green tomatoes but sweeter. I love eggplant. I love it grilled, baked, on pizza, tossed in pasta, roasted, or in salads. I love eggplant.

That said, if you're feeding someone suspicious of hitherto unexperienced fruits and vegetables, here's a sure-fire way to get 'em to eat eggplant and ask for more.

To begin with, pick out a lovely specimen; the skin should readily indent under the pressure of a fingernail and retain the mark. Eggplant is primarily fresh locally in the late summer and fall in more northern climates, but you can usually find eggplant from southern California or Mexico most of the year.

This is fast and dead-easy. First, whip up a little seasoned flour. I usually take a couple of cups of flour, add some lemon pepper, seasoned salt, garlic and onion powder, and a healthy dash or three of cayenne pepper (you could use something like smoked paprika, though, and that would be yummy, too.) How much of each, you ask? I have no real idea, honestly, a couple of healthy tablespoons of everything but the salt. I'm in my forties, now, so I'm making a concerted effort to cut down on how much salt I eat; hence, the lemon pepper and cayenne. Save this recipe. I use it to cook almost anything I'm even a little suspicious of, and most meats. If it's edible, it's gonna be yummier chicken-fried.

Mix it all up in a bowl (I usually just use my fingers, but if you're fussy or don't feel like washing your hands, a fork works just fine, too.) Here's the thing that takes a little experience, though: You need to taste it, to judge the level of salt and spices. You don't have to taste a lot, because, hello...dry flour. But you can simply lick the light coating of seasoned flour from the tines of your fork. If it just tastes bland and floury, add some more seasoning.

Next, beat a couple of eggs in a bowl and add a big splash of milk. Maybe a quarter of a cup. If it's a really big eggplant and you're planning to cook the whole thing, use another egg or two.

Wash your lovely purple eggplant, peel it, and chop it into one-inch cubes or thereabout. You don't actually have to peel it, but you might want to acclimate your picky eater to the idea of eggplant before asking them to eat something that nature serves inside a deep purple skin. All washed and peeled now? Great! Toss the cubes in the bowl of eggy-milk, making sure they're thoroughly wet but not gunky. Then toss the cubes of eggplant in the seasoned flour, just lightly coating them.

Take your favorite cast iron skillet and put about a quarter of an inch of olive oil in the bottom, over medium to medium-high heat. You don't want the oil to smoke, but it should be hot enough to sizzle up if you flick dry a little flour off your fingertips into the hot oil. When your oil is hot enough, lay your pieces of eggplant into the oil. Give them a few moments to brown, then turn them and let the other side brown thoroughly. Leave enough space between the pieces of eggplant for them to brown thoroughly. If you think you need to brown the sides a little bit, go for it.

The succulent little cubes should feel quite tender when you spear 'em with fork tines to turn over, in spite of the toothsome and alluring crunch of the breading. Yep. You've just made chicken-fried eggplant.

Yay for you! Drain on a couple of layers of clean paper towels on a plate, and serve hot. Or serve warm. Or eat 'em cold out of the fridge the next morning when you're rummaging for milk to put in your coffee. I'm still not sure how I like 'em best. I do recommend not letting anyone dip them in ketchup...but if you're feeding little kids and that's how they want to do it, then hey. There are worse culinary sins.

Shall we pretend this was healthy? We shall not. Although eggplant is awfully healthy and even the olive oil is good for you, it's still basically chicken-fried. If you're curious about how healthy eggplant really is, the nutritional breakdown looks like this:

Nutritional Values
Preparation
Serving Size
Carbs
Fiber (g)
Fat (g)
Energy (kj)
Eggplant - raw
100g
2.5
2.5
0.5
75
Baby Eggplant
4 (65g)
1.5
1.5
0
45
Eggplant - grilled
3 slices (90g)
2.5
2.5
0
75
Eggplant - fried
100g
2.5
2.5
25
1000

Friday, June 11, 2010

Mary's Bread

When my children were growing up, we lived 30 miles from a town. Needless to say, we did not run to the corner grocery to pick up a loaf of bread if we ran out. Even trying to plan ahead, there were times we ran out of things before shopping day. Fresh bread was always hard to keep on hand. Keep in mind, this is before bread machines, so we did it the old-fashioned way. Fortunately, my next door neighbors, about 3 miles away, were a colony of very friendly Hutterites. One of the ladies who worked in the bakery shared this easy recipe with me.

Mary's Bread

1/2cup warm water (approx 110 degrees)
1 Tablespoon sugar
1 Tablespoon yeast
Mix together to activate yeast

Mix 2-1/2 cups water
2 teaspoons salt
2 tsp sugar
Add 1 cup flour to make batter.
Add yeast mixture and a little more flour and 3 tablespoons melted lard (I use oil or shortening)
Add enough flour to make a stiff dough (approximately 3 cups)
Knead on floured board until dough is elastic.
Place in a greased bowl and grease top and cover and let rise 1 hour - punching down every 15 minutes.
Regrease top and cover and let rise 2 hours
Cut into 3 equal parts and let rest for 20 minutes Shape to fit greased pans.
Let rise another 2 hours
Bake at 375 degrees for 30 minutes or until done. Crust will be brown and sound hollow when tapped. Recipe will double well and produce 6 loaves, using just under 5 pounds of flour. I always doubled it; because, especially in the summer, we had extra kids staying with us and the first two loaves were inhaled with fresh homemade butter.

And speaking of homemade butter, I'd like to share a poem that brings back some of my childhood memories. This is written by Rachel Friend Capehart, Neosho MO., 1908-1991

When Mama Used To Churn

Sometimes a fresh baked loaf of bread
Can cause my heart to yearn,
Because it takes me back to days
When Mama used to churn.

I loved to watch her as she sat
Holding the Dazey churn;
Turning the gears paddled the cream...
Sometimes I'd take a turn.

It did not take so very long
To make the butter come
But I could scarcely wait for it
Because I wanted some

To spread on thickly sliced fresh bread,
Oh, what a treat was mine!
Nothing tastes half so good these days,
No matter where I dine.

Doing the wash-up seemed like fun--
All offered help I spurned--
Because I washed between the bites
After Mama had churned.

Since we were in the country and had milk cows, I was able to share the experience with Mac and my other daughters. I discovered it is a lot more fun in memories than in the actual doing, but nothing equals the taste.

For those of you who have never experienced the taste of fresh homemade butter, you can do it with whipping cream and the electric mixer, although the fresh farm cream is better. Just whip the cream past the whipped stage until it makes butter. Drain the milk off (it is okay to drink), rinse the butter in cold water, kneading it, until all the milk is rinsed out; salt lightly. Spread on your fresh bread as soon as you cut the loaf and enjoy!!

I grant you, buying a block of butter and making the loaf with a bread machine is easier and less time consuming, but not nearly as satisfying as doing it the old fashiond way and sharing the experience with your children and, in my case, the grandson. Every mom should try it at least once.

Monday, January 4, 2010

Back to Basics Nostalgia

Better Homes and Gardens New Cookbook The Better Homes and Gardens Cookbook was my mom's go-to resource whenever she was making something new or experimental. (She just called it "the red and white checkered cookbook, and I was a teenager before I realized that wasn't actually it's official title.) It's the cookbook that taught me to cook, laboriously working my way through from Baked Alaska to Zucchini Parmesan, while my long-suffering family was obliged to consume whatever I'd attempted.

If I could only have one cookbook on my shelf, I'd want it to be this one. But I'd want one of the older editions, not any of the post 1980s editions.

The recipes have changed subtly, I suspect to make them simpler and more accessible for cooks who don't grow up with a mother who once taught Home Ec (when they still had Home Ec in high schools)—but simpler to make doesn't necessarily translate to better cooking. In fact, sometimes those two goals are diametrically opposed. I discovered this completely by accident, after buying a new copy to replace my trusty old graduation-present cookbook that went missing during a house move. I've bemoaned its loss for years, now. So imagine my utter joy when I received a trusty older edition for Christmas, this year.

Thumbing through the indexed sections, seeing the well-loved recipes I haven't made in years, was like returning to a much-loved childhood home.

Sunday, September 20, 2009

Salmon Patties for under $5

Let's talk about salmon.

Mostly because it's autumn, and since I've moved to the Pacific NW I can't get enough of the stuff. I love salmon. I love to watch them in streams, at the hatchery in the park, on YouTube videos, and down at Pike's Market where the Flying Fish market guys heave them through the air for each other to catch.

And speaking of the fish market, my local fish place, VIS Seafoods, has been running some pretty terrific deals on fresh-caught salmon—but they smoke their own salmon, and they even can their own salmon, as well. If you use a 14.5 ounce can of salmon, one medium egg, a crushed up stack of saltine crackers (you can use the blender for this), and half a small onion, you'll get four smallish salmon patties for about $1.25 each.

Salmon patties were a once-in-a-while treat, when I was a child. There aren't a lot of opportunities for affordable fresh salmon in eastern Montana when you're a rancher raising a bunch of kids; so if we ate fish, generally that meant it was canned or—on rare special occasion—smoked.

Basic salmon patties are one of those absolutely simple recipes that you can tinker with for endless variations, according to your favorite flavor combinations. It's also something that, if you're just learning to cook (and so many youngish people I talk to are doing just that) it's dead easy to try, and hard to screw up too badly.

So you start with cooked salmon, either canned or leftover cooked. (A typical can of salmon, for our purposes, means the 14.5 ounce size.) Flake the salmon with a fork, and be careful to remove any bones. I remove any skin, too, mostly because it grosses me out. It's supposedly hugely nutritious, though. I don't know. It grosses my cat out, too, so it goes into the compost. Outside.
If you're using canned salmon, drain the water and set it aside—if your salmon-patty mixture is too dry, you can add a bit of the water back into the mixture, as needed. I usually go with a couple of tablespoons of mayo, instead of the water, though. Less of a "fishy" flavor, that way.

You'll also need a couple of eggs, and about a half-cup of either bread crumbs, cracker meal, or even yellow cornmeal, depending on your own preference. If you use cornmeal, you'll want to cut that proportion to about a third of a cup.

To that basic mixture, you can add a couple of teaspoons of lemon juice, a half-cup or so of finely chopped onion, and a couple of tablespoons of green pepper, chopped fresh dill, parsley, rosemary or your other favorite herbs and flavors. You can (and should) try some variations, like caramelizing the onion before adding it to your basic salmon-patty mixture.

A pinch of sea salt, a couple of grinds of fresh black pepper, or even a sprinkle of cayenne, if you like a little zing in your food, and you're ready to form patties and place into a heavy skillet with about a quarter of an inch of olive or vegetable oil. If you use olive oil, take care not to let the oil get quite hot enough to smoke. Cook the patties, carefully turning them once, until both sides are nicely browned.

You can serve your salmon patties as simply or as elaborately as you desire. Simple lemon wedges, seafood sauce, tartar sauce, are all favorite accompanying condiments. They're delicious on a toasted bun, with a little shredded lettuce, tomato, and a paper-thin slice of onion, topped with tartar sauce. If you feel like something more elaborate, how about plating the patties onto a simple bed of field greens with dried berries, and a dollop of chilled dill mayonnaise or remoulade?

You can use the same basic recipe for crab cakes, by the way, swapping out lump crab meat for the salmon in the recipe. Go forth, have fun, eat fish!

There are lots and lots of recipes on the web, if you're uncomfortable without exact measurements for a starting place.

Tuesday, May 19, 2009

Mom's Mexican Cornbread, sort of


I've been dithering about this blog for months, because I wanted it to be a place for lots of different functions. Collecting treasured recipes and remembrances. Pointing out that creating a home for yourself and your loved ones doesn't have to mean spending a lot of money, in fact, more often doing something yourself creates a sense of home and well-being that's much stronger than hiring a job out or having a special meal catered. Finally I decided I might as well just start off with a favorite recipe, then let things grow naturally, as they're inclined.

While everyone has their own favorite recipes for cornbread, I grew up with a Texan mom who was a kick-ass good cook, and I've never found any Mexican Cornbread recipe that can touch this one. Even so, I can never resist tinkering with it a bit, every time I make it.

This is a savory kind of cornbread, rather than sweet, and is even better as leftovers. Not that there's usually any left over.

Batter Recipe:
2 cups yellow cornmeal
1 can of cream style corn
A healthy pinch of salt (if you're still measuring salt with a teaspoon or half-teaspoon, stop it. Start experimenting with pinches, instead. It makes it look like magic when anyone's watching you cook something that turns out to be really delicious.)
1/2 tsp baking soda
2 T baking powder
2 T oil (I like olive oil. Some cooks will tell you not to use it, because it tastes different. It does. It tastes better.)
1 or 2 eggs (I always use two, because my mom always did. We recently discovered, though, that the recipe she has, as it's written, actually only calls for one egg.
1 cup milk (Give or take, depending on how much other stuff you add to the batter in the next step.)

I make the batter pretty much like I'd make any batter, mixing the dry ingredients in a big bowl, then whisking the wet ingredients together in a big measuring cup, and finally stirring the wet ingredients into the dry with a big wooden spoon.

Optional stuff to add to the batter:
Bacon, chopped and fried crisp (We will be capitalizing Bacon in this blog, out of reverence for one of the best tasting things ever invented. You'll note that I didn't say how much. You'll want three or four slices, at least - but if you really like bacon, feel free to use a little extra.)

A couple of cups of shredded cheddar or jack cheese

A half-cup of fresh or roasted whole-kernel corn

A couple of chopped roasted green and red chilies or jalapenos, depending on personal taste. I use jalapenos. ETA: The canned jalapeno slices like you'd use for nachos work just fine! No need to mess with fresh peppers unless you're a masochist.

If you're feeding meat-lovers, you're also going to need:
A pound of ground beef, scrambled with some garlic and a pinch of salt, then drained (you can use a mix of beef and chorizo, but omit the extra salt if you do.)

Another half-pound or so of grated cheddar or jack cheese.

Put a couple of tablespoons of cooking oil in your well-seasoned ten-inch cast iron skillet and pop it in the oven on 375 F for about ten minutes (if you don't have a well-seasoned cast-iron skillet, we'll have to remedy that. But in the interests of getting your cornbread cooked now that you've already mixed the batter, if you have to use a baking dish this time, we'll just make do. Skip the pre-heating step, though.)

Put a little less than half of the batter into the bottom of the skillet and spread gently into an even layer. Layer the cooked ground beef evenly over the batter, then add a generous layer of shredded cheese. Top with the remaining batter. You'll have to sort of dab it on, to spread it evenly atop the other layered ingredients. Top this with more shredded cheese. you can also top with a lovely starburst pattern of sliced jalapeno peppers, if you like them a lot. I do.

Pop the whole thing into the oven (still at 350-375 F) for 35-40 minutes, or until a table knife inserted halfway between the edge and the center of the cornbread comes out clean. Let it rest for 5-10 minutes after removing from the oven, and serve. Sour cream goes with your cornbread very nicely, but honestly, I love it best of all just plain.