Showing posts with label summer dishes. Show all posts

Thursday, May 5, 2011

Yummy Scalloped Pineapple

I recently had the joy of spending Easter in Denver with two of my daughters and their families (Mac couldn't make it, bummer). Anyway, we had a lovely Easter dinner after the beautiful Easter service at Galilee Baptist church. Easter isn't really the only time I go to church. We had a friend of my daughter and some of her husband's family join us and, all in all, had a great day. I met a new friend and we all visited and played games and just had lots of fun after the great meal.

Speaking of the great meal, my daughter served a recipe that I had never experienced, scalloped pineapple. That's what I want to share with you. It made a great side dish to go with the honey-baked ham, YUM.


SCALLOPED PINEAPPLE

1/2 cup margarine, melted
4 cups bread crumbs (we used King's Hawaiian Sweet bread)
1-1/2 cups sugar
3 eggs, beaten
1/2 cup evaporated milk
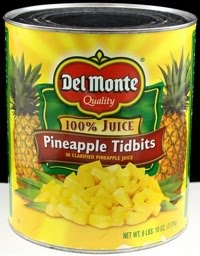
2 15 ounce cans of pineapple tidbits in juice, DO NOT DRAIN

Mix together and bake in a greased casserole dish
We used an 9" x 9" pyrex dish.
Bake 35 to 40 minutes at 350 degrees.

I know this sounds like pineapple bread pudding, but tastes nothing like any bread pudding. The bread isn't particularly noticible, but the pineapple and custard are excellent. Don't know that I'll just use it to accompany ham. Might try is as dessert with a little whipped cream topping.

Thursday, June 17, 2010

More Eggplant!

Just a quick heads-up for any of you veggie-lovers: Over on Marguerite Says you'll find Marguerite Butler's recipe for eggplant casserole. She took mercy on us, after much pleading in the comment thread, here. I remember Mom making something similar to this casserole, with cheddar cheese, saltine crackers, onion, and yellow summer squash. This one is definitely going on my list of eggplant dishes to try.

Monday, June 14, 2010

Hooray for Veggies!

One of the things I remember most fondly about my mother's kitchen is that us kids always tried at least one bite of something new. That thing where kids wrinkle up their faces and say "I don't like that!" when you know full well they've never tasted it before? There was no getting away with that, with my mom.

For example, let's talk about eggplant. (You'll also sometimes see it called aubergine, melongene or brinjal, depending on where in the great big world you're located.)

Now, eggplant is a gorgeous creation, plump and purple and slightly alien-looking, with a flavor that's delicately reminiscent of fried green tomatoes but sweeter. I love eggplant. I love it grilled, baked, on pizza, tossed in pasta, roasted, or in salads. I love eggplant.

That said, if you're feeding someone suspicious of hitherto unexperienced fruits and vegetables, here's a sure-fire way to get 'em to eat eggplant and ask for more.

To begin with, pick out a lovely specimen; the skin should readily indent under the pressure of a fingernail and retain the mark. Eggplant is primarily fresh locally in the late summer and fall in more northern climates, but you can usually find eggplant from southern California or Mexico most of the year.

This is fast and dead-easy. First, whip up a little seasoned flour. I usually take a couple of cups of flour, add some lemon pepper, seasoned salt, garlic and onion powder, and a healthy dash or three of cayenne pepper (you could use something like smoked paprika, though, and that would be yummy, too.) How much of each, you ask? I have no real idea, honestly, a couple of healthy tablespoons of everything but the salt. I'm in my forties, now, so I'm making a concerted effort to cut down on how much salt I eat; hence, the lemon pepper and cayenne. Save this recipe. I use it to cook almost anything I'm even a little suspicious of, and most meats. If it's edible, it's gonna be yummier chicken-fried.

Mix it all up in a bowl (I usually just use my fingers, but if you're fussy or don't feel like washing your hands, a fork works just fine, too.) Here's the thing that takes a little experience, though: You need to taste it, to judge the level of salt and spices. You don't have to taste a lot, because, hello...dry flour. But you can simply lick the light coating of seasoned flour from the tines of your fork. If it just tastes bland and floury, add some more seasoning.

Next, beat a couple of eggs in a bowl and add a big splash of milk. Maybe a quarter of a cup. If it's a really big eggplant and you're planning to cook the whole thing, use another egg or two.

Wash your lovely purple eggplant, peel it, and chop it into one-inch cubes or thereabout. You don't actually have to peel it, but you might want to acclimate your picky eater to the idea of eggplant before asking them to eat something that nature serves inside a deep purple skin. All washed and peeled now? Great! Toss the cubes in the bowl of eggy-milk, making sure they're thoroughly wet but not gunky. Then toss the cubes of eggplant in the seasoned flour, just lightly coating them.

Take your favorite cast iron skillet and put about a quarter of an inch of olive oil in the bottom, over medium to medium-high heat. You don't want the oil to smoke, but it should be hot enough to sizzle up if you flick dry a little flour off your fingertips into the hot oil. When your oil is hot enough, lay your pieces of eggplant into the oil. Give them a few moments to brown, then turn them and let the other side brown thoroughly. Leave enough space between the pieces of eggplant for them to brown thoroughly. If you think you need to brown the sides a little bit, go for it.

The succulent little cubes should feel quite tender when you spear 'em with fork tines to turn over, in spite of the toothsome and alluring crunch of the breading. Yep. You've just made chicken-fried eggplant.

Yay for you! Drain on a couple of layers of clean paper towels on a plate, and serve hot. Or serve warm. Or eat 'em cold out of the fridge the next morning when you're rummaging for milk to put in your coffee. I'm still not sure how I like 'em best. I do recommend not letting anyone dip them in ketchup...but if you're feeding little kids and that's how they want to do it, then hey. There are worse culinary sins.

Shall we pretend this was healthy? We shall not. Although eggplant is awfully healthy and even the olive oil is good for you, it's still basically chicken-fried. If you're curious about how healthy eggplant really is, the nutritional breakdown looks like this:

Nutritional Values
Preparation
Serving Size
Carbs
Fiber (g)
Fat (g)
Energy (kj)
Eggplant - raw
100g
2.5
2.5
0.5
75
Baby Eggplant
4 (65g)
1.5
1.5
0
45
Eggplant - grilled
3 slices (90g)
2.5
2.5
0
75
Eggplant - fried
100g
2.5
2.5
25
1000

Monday, May 31, 2010

Grilled Salmon!

When I first moved to the Pacific Northwest, I could not eat enough salmon to suit me, and at the time, salmon was extraordinarily reasonably-priced, in-season.

Salmon cooked outside, in the fresh Northwest air, on a charcoal grill has to be one of the finest culinary experiences available, anytime, anywhere. If you've been in the Pacific Northwest for any amount of time, you'll already be familiar with the popularity of good local fresh "salmon bbq"—it took me a little while to realize that doesn't actually mean salmon smothered in a tangy catsup-based sauce; rather, barbecued salmon is simply salmon cooked on a barbecue grill. The best part of that, of course, is that there's no need to wait for a special occasion. Salmon is healthy, delicious, and remarkably easy to prepare.

First, of course, you need a nice piece of fish. I like to plan for 6-8 ounces of fresh fish (uncooked weight) per person served. If you're serving particularly hearty eaters, though, figure 10-12 ounces. Before you decide exactly how much fish you might, you may also want to plan ahead and think about how nice it would be to have cold grilled salmon tomorrow, to top a salad or to mix with a little mayo and some capers.

There are a couple of things you need to know to buy good fish. You can find pretty reasonably-priced salmon at your local supermarket—but chances are it's going to be previously frozen. Now, that's not a deal-breaker by any means, but you want to be certain the flesh is firm and the odor isn't fishy or strong, the color should be bright and your piece of fish should smell like ocean. Whether you prefer the tail-end or the head end will depend partly on how well-done you like your salmon cooked, and whether you like your fish ever-so-slightly fattier. (Salmon fat, by the way, contains an enormous amount of extraordinarily healthy substances, so don't be worrying about the fat content, okay?) The tail-end, for example, is a good deal thinner, so will cook much more quickly. I prefer a nice thick fillet for grilling, because you can cook a single piece of fish big enough to serve everyone. If you happen to be serving a sizable group, you can most certainly grill salmon whole, as well. This is preferable, as far as I'm concerned, because cooking the fish in a single large piece gives you a little more leeway in terms of heat and cooking time.

I like to use a good natural lump charcoal, rather than briquets; again, though, you've got quite a lot of room to use your own favorite grilling technique. You can even use your propane grill and no one will give you any funny looks. If you've not grilled fish before, here's one sure-fire method that will please any salmon-lover, even that picky aunt who always tells you your marinade is a little too strong:
  • Start your charcoal about a half-hour or forty minutes before you plan to begin cooking. You want a nice, hot grill; hot enough to cook a steak, and your charcoal should be evenly and steadily glowing white on the edges.
  • Take your piece of fish out of the refrigerator and let it warm on the counter for ten or fifteen minutes. Squeeze a lemon and chop some fresh dill into a bowl, and save about half your lemon/dill mixture to use on the grill, when you turn the fish.
  • Just before you're ready to pop it onto the grill, rub the fish all over with a little olive oil, lemon, and fresh chopped dill. This is important: OIL THE FISH, NOT THE GRILL. Do I need to say that louder, or did you get it the first time? If you oil the grill, your fish will stick. Also? Don't use any salt on your raw fish. It only draws out the yummy juices before your fish ever gets to the grill.
  • No matter if you're cooking steaks or a fillet, you only want to turn the fish once, so you don't dry it out. Lay the fillet flesh-side to the grill, which should be hot enough to sear grill-marks into the yummy pink of the salmon. Don't poke at it. You only need to leave the fish flesh-side down long enough to get a good sear, then turn the fillet so the skin-side is on the grill, and baste your fish with a bit of your lemon and dill mixture.
  • Don't overcook your fish. As soon as the thickest part of your fillet begins to separate into flakes when you pull gently with a fork, your fish is done. Serve immediately, with a nice bearnaise sauce if you're feeling fancy, or wedges of lemon if you like to keep it simple.
Most of all, have fun; drink good beer or a fresh, crisp wine, and enjoy your grilled salmon with people you like spending time with. Happy spring, everyone!

Wednesday, May 20, 2009

Favorite Pasta Salad

tri-color pasta
So here's the thing, I know pasta salads are kind of out of style. If you're like me, over forty and a product of the American Heartland, you've probably had endless variations of the macaroni salad we all grew up eating at church potlucks, picnics, and backyard barbecues. And later, we all ate more than our share of bland, soggy-noodled, vinaigrette-drenched weird pasta things off of restaurant and buffet salad bars, in the eighties and nineties.

And every time I put one of those salads on my plate, I regretted it later, and couldn't help but think of ways it could have, should have, and might be better-tasting and prettier.

Because I like pasta, and I like salad, so it didn't seem like such a difficult thing to combine those into something both tasty and attractive. So I started experimenting at home. One of the things I decided was that, while mayonnaise-based dressings certainly have their place, that place isn't on any kind of pasta except maybe macaroni. One of the other things I noticed right off is that cheaping out on ingredients is never, ever a good idea. Mediocre ingredients combine to make mediocre food.


I still love this pasta salad. And it keeps marvelously in the fridge.

1 lb of tri-colored rotini pasta, cooked al dente, drained, and set aside to cool
1 cup or so of raw broccoli washed and divided into bite-sized florets
1/2 cup or so, finely chopped red onion
1/2 cup or so of chopped red or yellow bell pepper
1/2 cup or so of sliced black olives
1 cup or so of those little sweet grape tomatoes
1 cup or so of shredded mozzarella cheese
1 cup or so of good quality sliced pepperoni, hard salami, or a mixture thereof
1 ripe but not squishy avocado, chopped (I usually serve this on the side, unless I know the entire salad is going to be disposed of in a single sitting) Don't add the avocado until right before you serve the salad, in any event.

Once your pasta is cool, toss all the ingredients together in a big bowl. Be gentle. You don't want mashed pasta. If it looks like it could use a little more of your favorite ingredient, don't be shy. Add it in!

Dressing:
This isn't hard, either. I typically will cheat, and start with a package of seasoning mix for oil and vinegar style Italian salad dressings. Use good olive oil, look at the directions then cut the amount of called-for oil in half. Combine with a yummy wine vinegar, about as much as the directions call for, then add another good splash or two.  ETA: Add a good rounded spoonful of a country-style dijon mustard. I like the coarse-ground, your mileage my vary. (Thanks for reminding me, Mom!) The dressing should taste so good you want to drink the stuff. Then pour it over the mixed salad ingredients and toss again, so the pasta is thoroughly coated.

It's edible at this stage. In fact, it's pretty good, really. It's even better if you can stand to wait a couple of hours, though, so the pasta has absorbed some of the flavors of the stronger ingredients and the dressing.

Ready to serve it? This is the cool part, and the step that separates a dish that's really pretty from a dish that's just, well, a bowl of food. Take a few of those slices of pepperoni, maybe some lengthwise slices of avocado, and do a simple pattern on the top of the bowl. The design won't last beyond the first serving, but who cares? It's a simple touch that indicates you're delighted with making a dish, you're happy to serve a dish, and you take pride in what you've done.

Also, that you like to play with your food.